Thursday, August 8, 2013

Crawling Knee Pads for Baby TUTORIAL

Rodilleras para el Gateo de tu Bebe TUTORIAL


Baby M started to crawl  couple of months ago and I was concern that the tile and the wood floor at our house would be rough on his baby knees. It is summer here and too hot to wear pants so he needed some cushion to crawl on. I looked  online to purchase some but they are quiet expensive so I went ahead and made some pads myself. How much did I spent? well nothing ..I had all the materials I needed. 
For not means these are not perfect or the most cute thing ever but they sure do the job!
We need: long socks, small pieces of fabric, scissors,cotton stuffing ,thread and needle.


Bebé M empezó a gatear  hace un par de meses y pense que el piso de madera y la mayolica  de la cocina de  nuestra casa sería un poco dura para las rodillas del bebé. Es verano aquí y hace calor durante el dia  para usar pantalones por lo que necesitaba un poco de soporte para que pueda gatear sin preocupaciones. Busque en el internet para poder comprarlos , pero  me parecieron algo caros y faciles de hacerlos, así que me adelanté e invente unas rodilleras de bebe. Y lo mejor de todo que no gaste di un peso, ya que todos los materiales los tenia en casa.
Pero esto no significa que estas rodilleras son perfectas o que sean las mas lindas eh, pero sí que son muy utiles !
Necesitamos: calcetines largos, pequeños trozos de tela, tijeras, relleno de algodón, hilo y aguja.


First step, use scissors and cut the socks just above the ankle    

Primer paso, utilice unas tijeras y corte los calcetines justo por encima de la parte del tobillo


We need 4 ovals of fabric, about 4.5 inches long (I'm guessing)

Necesitamos 4 óvalos de tela, alrededor de 4,5 pulgadas de largo (supongo la medida)


Stitch two ovals together facing out, I used zig zag stitch. You need to leave about 2 inches open (non stitch) for our next step.

Cose dos óvalos juntos mirando hacia fuera, dale puntada zig zag. Tienes que dejar una orificio de 2 pulgadas  para nuestro próximo paso.


 Fill with cotton stuffing the oval (this will be the cushion  for the baby's knee).Once you fill it start stitching again and close the oval.

Rellena el óvalo con relleno de algodón  (este será el soporte  para la rodilla del bebe).Una vez que los hayas rellenado ,empieza a coser cerrando el orificio
   
Repeat the same process with the other two ovals

Repite el mismo proceso con los otros dos ovalos sobrantes


Use the thread and the needle and stitch the oval pad to the sock.

Ahora usa el hilo y la aguja y ponte a coser cada ovalo en cada media 


You are done!!

Terminaste!


Put them on baby and let those little knees crawl as fast as they want  : )

Coloca las rodilleras en el engreido de la casa y deja que sus rodillitas gateen tan rapido como puedan : )


Tips:
-Try not to put too much stuffing inside the pad..it could be to hard for baby to crawl on them.
- To choose the right sock, be sure the elastic of the welt is not too tight for the baby's leg.
-It is not necessary to use the sewing machine, just stitch by hand.
-If you don't have cotton stuffing you also can use cotton balls, sponge or bubble wrap plastic.

Consejos:
-Trata de no poner demasiado relleno dentro de la almohadilla de la rodillera .. podría ser difícil para el bebé gatear en ellos.
- Para elegir el calcetín adecuado, asegúrese de que el elástico del ribete no sea demasiado apretado para el bebé
-No es necesario el uso de la máquina de coser, tambien puedes usar puntada a mano.
-Si usted no tiene relleno de algodón también puede utilizar bolitas de algodón, esponja o plástico de burbujas.

Thursday, August 1, 2013

Welcome Fairies..

Bienvenidas Hadas..


We are finally done putting together our fairy garden. We patiently waited for our chia seeds to grow, it turned out just magical. Here is a tour for you, please join us.

Finalmente terminamos de armar nuestro jardin de hadas de este verano, esperamos pacientemente que crezcan nuestras semillas de chia, y valio la espera, simplemente quedo maravilloso. Aqui les hago un tour, porfavor siganme:


My favorite fairy of all times "C" admiring and searching for fairy footprints.I loved when she said "Mom thank you so much for helping me and doing this with me"..I was speechless..I love you girl!

My hada favorita de todos los tiempos " C" admirando y buscando por huellas de haditas en nuestro jardin, me movio el corazon cuando me dijo "Mama gracias por ayudarme a armar este jardin , muchas gracias y me dio un super abrazo" Me dejo sin palabras..es que es la nina de mis ojos!


The fairies table where they can have some tea and maybe light up a tiny blue bee wax candle

La mesita para que las hadas puedan disfrutar de la hora del te acompanandas de una velita de cera de abeja


This is the fairies sticks,rocks and red flower  house, just to have some rest and enjoy the garden

Esta es la casa de rocas, palitos y flores para que las hadas descansen


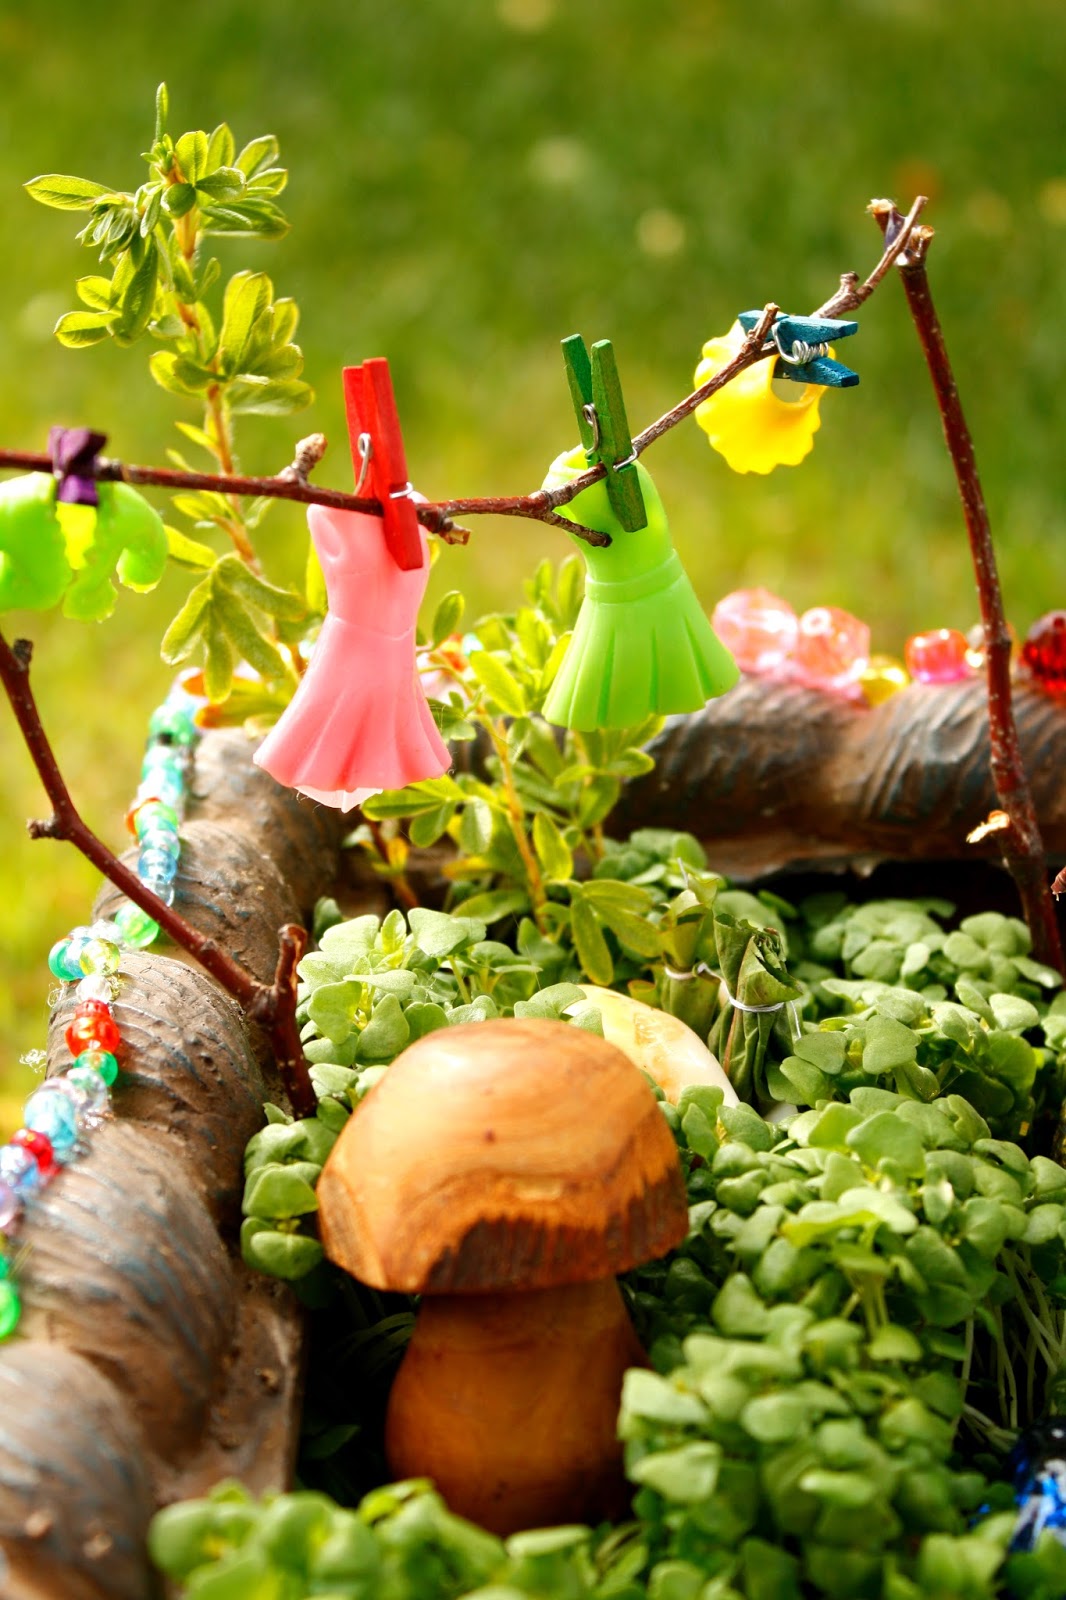
I am pretty sure they love washing their clothes and this is a nice place to hang those beautiful dresses and skirts.

Estoy segura que las hadas lavan su ropa y este es el lugar ideal para que tiendan esos vestidos y faldan tan coloridas

This is the slide pool with yellow flower petals for them refresh after a hot day of working on fairyland

Estes es el tobogan de piscina, con petalos amarillos para que las hadas se relajen despues de una jornada muy larga en fairyland


Every fairy needs a magic wand..right? I am pretty sure they will love this set of tiny wands we made for them. I think the bunny already likes them.

Toda hada necesita una barita magica...verdad? Bueno es que estamos seguras que les encantara estas baritas pequenitas. Bueno al menos creo que al conejito si le gustan.


Nothing better than a pink hammock  to relax and enjoy the blue sky 

Nada mejor que una hamaca rosa para relajarse y disfrutar del cielo azul


C is very sure that the fairies will love their swing as much as she loves it!!

C esta muy segura que a las hadas les encantará su columpio tanto como a ella!


This is a beautiful fairy shell, C got it from daddy as a special treasure from the ocean, and she decided that the fairies will love to use it as their shop or maybe just to play hide and seek : )

Esta es una hermosa conchita de hadas, C la recibió de papá como un especial tesoro del océano, y sugirio que las hadas les pueda encantar usarla como su tienda o tal vez sólo para jugar a las escondidas : )


The treasure box for our tiny friends..I am pretty sure the fairies will like these jewels. 

La caja del tesoro para nuestras pequeñas amigas ..A las hadas le va a gustar estas joyas


These magic dust leafs bags will help the fairies to keep up the magic going.

Estas son bolsitas de hojas con polvos magicos ,ayudaran a las hadas a hacer su magia


One of our neighbors was going to throw this beautiful  flower pot at the garbage, we asked if we could keep it and they said ..yes!

Uno de nuestros vecinos iba a tirar esta hermosa maceta en la basura, les preguntamos si podíamos quedarnos con ela y nos dijeron que sí ..!

We also put some lanterns at our garden to help the fairies bring some light to the dark nights in Alaska!

Tambien agregamos linternas para ayudar a las hadas a ilumar sus noches en Alaska!


Thank you for looking and please visit the The Magic Onions to delight your eyes with some other fairy gardens.

Gracias por visitarme y porfavor visite el blog  The Magic Onions para seguir disfrutando de mas ideas de los jardines para hadas.


Monday, July 29, 2013

Big Summer Sale..

Gran Oferta de Verano


Visit Under The Swing Etsy shop for 25%OFF entire store .Please use code: SUMMER2013
You have until August 12. Hurry up! 

Visita mi tienda Etsy "Debajo del Columpio" y obtendras 25% OFF en cualquier producto que eligas. Para pagar usa el codigo SUMMER2013.Tienes hasta el 12 de Agosto, no dejes pasar esta oportunidad!

Saturday, July 27, 2013

Flower Ice Ballons

Flores en Hielo con Globos


This is another fun activity we decided to make this summer.You just need  balloons, water and flowers.

Esta es otra actividad divertida que decidimos hacer este verano. Necesita algúnos globos, agua y flores.


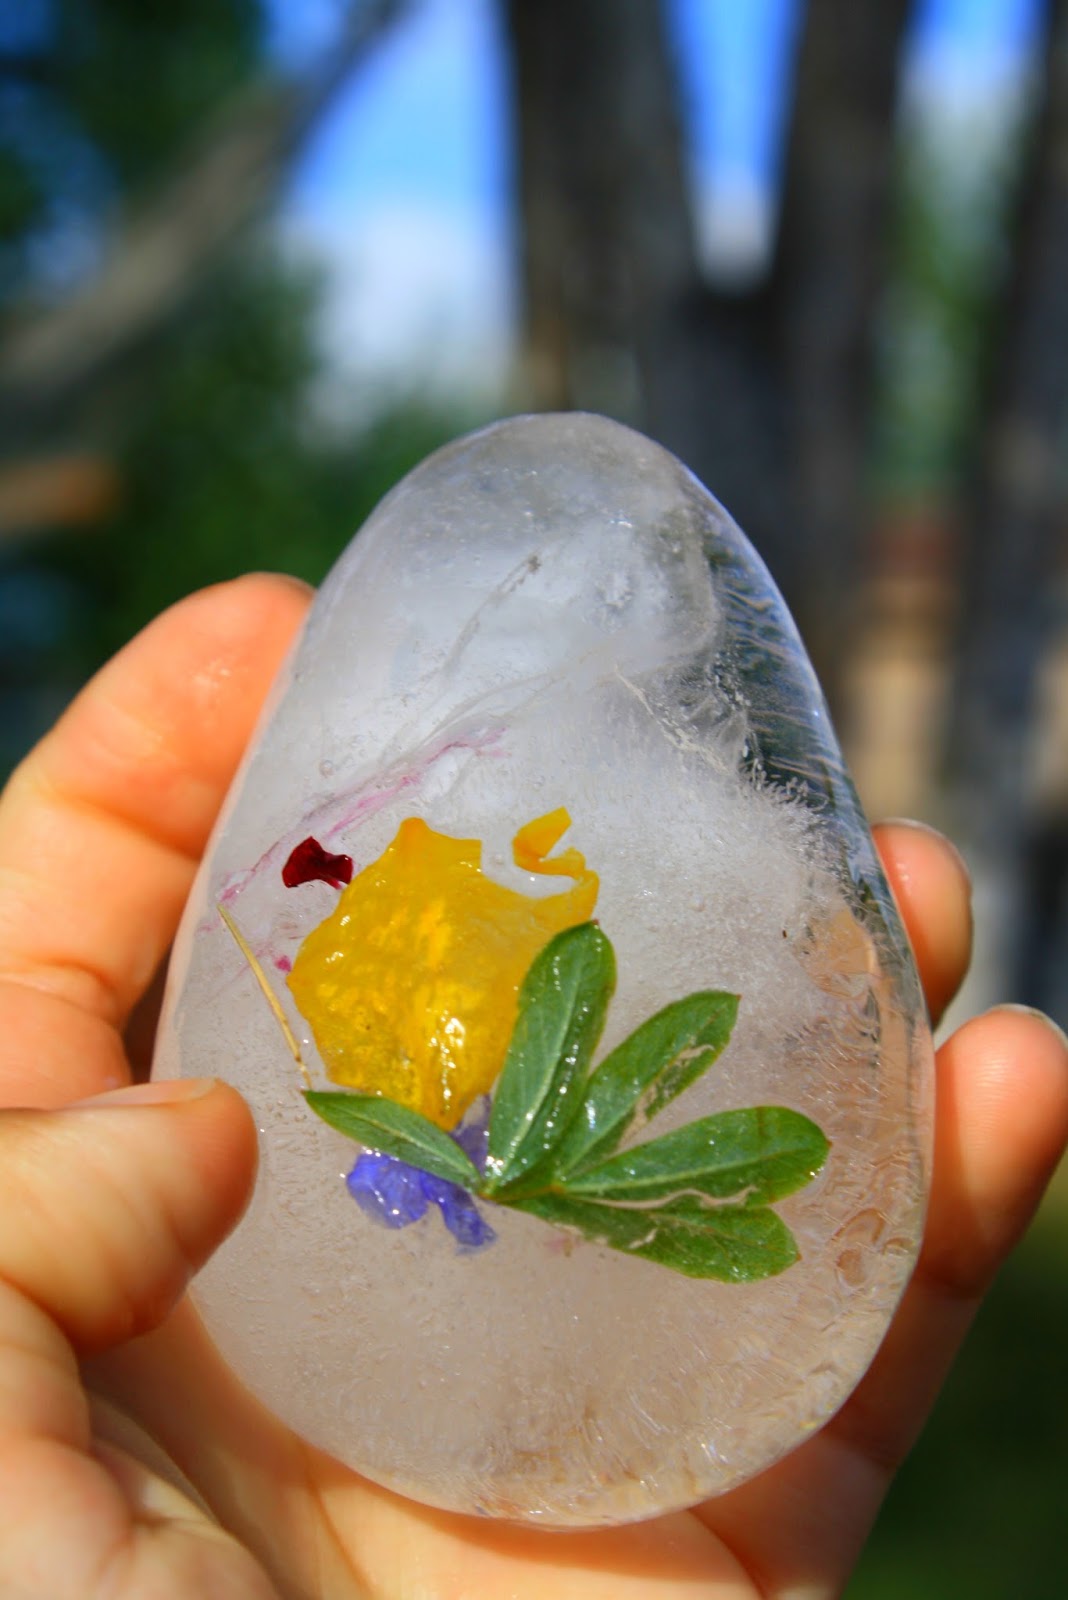
First you gently need to squeeze the flowers inside the balloon (we used tinny sticks to help us push the flowers inside the balloons), then fill them with water and put them in the freezer for as long as you need to freeze them. C was asking every hour if they were ready..she kept peeking and peeking into the freezer.

Lo primero es poner  las flores en el interior del globo (usamos palitos del jardin para ayudar a empujar las flores dentro de los globos), luego llenar los globos con agua y ponerlos en el congelador hasta que se congelen . C me preguntaba a cada rato si ya estaban listos.. ella iba a revisar el congelador y asegurarse de que aun no estaban listos..


We waited until next day, took them to our yard and C  and baby M threw each balloon to make them pop and it worked.

Nosotros esperamos hasta el dia siguiente para sacar los globos de congelador,nos fuimos al jardin , C lanzo los globos al pasto y se reventaron! asi que solo nos quedamos con el hielo en forma de globo.


We had so much fun playing and eating the flower balloon ice. Baby M had the chance to experience how cold his little toes and hands can get.It was a good activity for both kids to experience together and just learn a little bit more about our senses.

Nos la pasamos bien, sintiendo el hielo (nos vino de maravilla porque estaba hizo una calor muy fuerte por aqui) y a bebe M le dimos la oportunidad de sentir el frio, es un buen ejercicio para trabajar los sentidos. Lo bueno de esta actividad es que pude realizarla con los dos ninos al mismo tiempo.


ohh almost forget bring towels with you..hands get soooooo cold very quick!!

ahhh casi me olvido, lleven toallas tambien ya que las manos se enfriannnnnn muy rapido!!


Have a nice weekend.

Buen fin de semana.

Monday, July 22, 2013

Build Your Own Toy House

 
Crea Tu Propia Casa de Juguete                                


This was such a fun project! I saw this idea on The Artful Parent and I knew C will enjoy it.

Este fue un proyecto divertido! Vi esta idea en El Padre Ingenioso y sabía que a C le agradaria


C had one of her friends over that day so we decided that it will be just the perfect project to they to make.First we looked for two small boxes and I was so lucky to found two.Then I cut doors, windows and make the shape of a roof.


C tuvo uno de sus amigos en casa ese día, así que pense que era el proyecto perfecto para ese dia. Primero buscamos dos cajas pequeñas y  tuve la suerte de encontrar dos.Con ayuda de las tijeras recorte  puertas, ventanas y hacer la forma del techo.


Next I gave the kiddos some drawing paper to draw and color on it.

Luego les di a los pequespapel para dibujar y colorear 


We glued the paper they colored on the box

Pegamos el papel  coloreado en la caja


C and her friend decorate the house with : poms,colored pasta ,buttons, scrapbooking flowers, beads, glitter and watercolor paint.

C y su amigo decoraron la casa con: pompones, pasta de colores, botones, scrapbooking flores, perlas, escarcha y pintura de acuarela.


After they were done decorating the toy houses, we put some tiny friends to play in.

Una vez terminado su projecto, buscaron algunos pequenos amiguitos para que jueguen en ellas


And some flashlights too...I love the simplicity of being a kid...don't you?

Y algunas linternas también ... Me encanta la simplicidad de ser  niño ... ¿a ti..no?