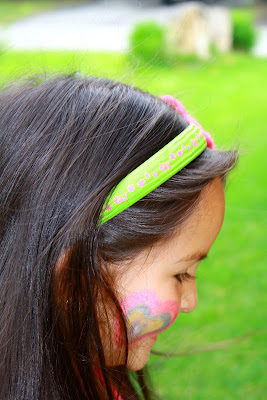
Remember my last post about our visit to the farm, well we kept some of the wool that C sheared from the sheep. We dyed pink and brought it home. I asked C what could we do with the wool and she say she wanted a headband.
Recuerdan mi último post sobre nuestra visita a la granja? Bueno trajimos a casa algunas sobras de la lana que C esquilo de la oveja, la teñimos rosa, entonces le pregunté a C ¿qué podíamos hacer con la lana y ella me dijo que quería una banda para la cabeza.
You will need:
Wool roving (2 colors)
Felting needle
A flower shape cookie cutter (I don't have one so I used a snowflake shape that found at my kitchen.it worked great).
A foam mat
A simple headband
and hot glue
Necesitaras:
Fibra de Lana (2 colores)
Aguja para fieltrado
Un cortador de Galletas en forma de flor (yo no tengo la flor asi
que use uno de copo de nieve, y salio bien)
Una esponja como base
Una banda para la cabeza
Goma caliente
Put the wool inside the cookie cutter
Coloca la lana dentro del cortador de galletas
Start using your needle to poke on the wool
Empieza a pinchar la lana con la aguja
Let your child help but please tell her to be careful and not put her fingers on the way of the needle
Deja a tu nene que te ayude pero dile que porfavor tenga cuidado y no ponga sus deditos donde va la aguja porque puede pincharlos (y duele..dimelo a mi!!)
After you think the wool is getting on shape, flip it over and keep poking then take the wool out from the cutter
Cuando veas que la lana esta cogiendo forma, dale la vuelta y repite el mismo procedimiento
Ok Now we are going to work on the button of the flower, get the other color of wool out (we choose purple that I already have) and gently pull a small piece of it
Ahora vamos a hacer el boton de la flor, ten listo el otro color de fibra (usamos morado) y delicadamente jala un trozo pequeno de esta
Roll it to make a small ball
Enrolla la fibra formando una bola
Put in the the center of our flower and start poking it with the needle
Colocala en el centro de la flor y empieza a pinchar con la aguja
Now your flower is ready for the next step
Ahora que ya tenemos la flor sigamos con el siguiente paso
Get the headband, glue gun and the flower ready
Necesitaremos la banda, la flor y la silicona caliente
Put glue into the back of the flower and glued to the headband
Coloca la goma en la parte posterior de la flor y pegala en la banda
Now you have a unique beautiful wool flower headband and a happy girl... doesn't get better than that!
Ahora tienes una unica y hermosa banda de cabello y una nina feliz!!..mejor premio que ese no hay!
Love you kid!
Te amo mi chikita!


1 comment:
Qué bonito! Gracias por el tutorial!
Post a Comment