Showing posts with label Tutorial. Show all posts

Thursday, August 8, 2013

Crawling Knee Pads for Baby TUTORIAL

Rodilleras para el Gateo de tu Bebe TUTORIAL


Baby M started to crawl  couple of months ago and I was concern that the tile and the wood floor at our house would be rough on his baby knees. It is summer here and too hot to wear pants so he needed some cushion to crawl on. I looked  online to purchase some but they are quiet expensive so I went ahead and made some pads myself. How much did I spent? well nothing ..I had all the materials I needed. 
For not means these are not perfect or the most cute thing ever but they sure do the job!
We need: long socks, small pieces of fabric, scissors,cotton stuffing ,thread and needle.


Bebé M empezó a gatear  hace un par de meses y pense que el piso de madera y la mayolica  de la cocina de  nuestra casa sería un poco dura para las rodillas del bebé. Es verano aquí y hace calor durante el dia  para usar pantalones por lo que necesitaba un poco de soporte para que pueda gatear sin preocupaciones. Busque en el internet para poder comprarlos , pero  me parecieron algo caros y faciles de hacerlos, así que me adelanté e invente unas rodilleras de bebe. Y lo mejor de todo que no gaste di un peso, ya que todos los materiales los tenia en casa.
Pero esto no significa que estas rodilleras son perfectas o que sean las mas lindas eh, pero sí que son muy utiles !
Necesitamos: calcetines largos, pequeños trozos de tela, tijeras, relleno de algodón, hilo y aguja.


First step, use scissors and cut the socks just above the ankle    

Primer paso, utilice unas tijeras y corte los calcetines justo por encima de la parte del tobillo


We need 4 ovals of fabric, about 4.5 inches long (I'm guessing)

Necesitamos 4 óvalos de tela, alrededor de 4,5 pulgadas de largo (supongo la medida)


Stitch two ovals together facing out, I used zig zag stitch. You need to leave about 2 inches open (non stitch) for our next step.

Cose dos óvalos juntos mirando hacia fuera, dale puntada zig zag. Tienes que dejar una orificio de 2 pulgadas  para nuestro próximo paso.


 Fill with cotton stuffing the oval (this will be the cushion  for the baby's knee).Once you fill it start stitching again and close the oval.

Rellena el óvalo con relleno de algodón  (este será el soporte  para la rodilla del bebe).Una vez que los hayas rellenado ,empieza a coser cerrando el orificio
   
Repeat the same process with the other two ovals

Repite el mismo proceso con los otros dos ovalos sobrantes


Use the thread and the needle and stitch the oval pad to the sock.

Ahora usa el hilo y la aguja y ponte a coser cada ovalo en cada media 


You are done!!

Terminaste!


Put them on baby and let those little knees crawl as fast as they want  : )

Coloca las rodilleras en el engreido de la casa y deja que sus rodillitas gateen tan rapido como puedan : )


Tips:
-Try not to put too much stuffing inside the pad..it could be to hard for baby to crawl on them.
- To choose the right sock, be sure the elastic of the welt is not too tight for the baby's leg.
-It is not necessary to use the sewing machine, just stitch by hand.
-If you don't have cotton stuffing you also can use cotton balls, sponge or bubble wrap plastic.

Consejos:
-Trata de no poner demasiado relleno dentro de la almohadilla de la rodillera .. podría ser difícil para el bebé gatear en ellos.
- Para elegir el calcetín adecuado, asegúrese de que el elástico del ribete no sea demasiado apretado para el bebé
-No es necesario el uso de la máquina de coser, tambien puedes usar puntada a mano.
-Si usted no tiene relleno de algodón también puede utilizar bolitas de algodón, esponja o plástico de burbujas.

Monday, July 22, 2013

Build Your Own Toy House

 
Crea Tu Propia Casa de Juguete                                


This was such a fun project! I saw this idea on The Artful Parent and I knew C will enjoy it.

Este fue un proyecto divertido! Vi esta idea en El Padre Ingenioso y sabía que a C le agradaria


C had one of her friends over that day so we decided that it will be just the perfect project to they to make.First we looked for two small boxes and I was so lucky to found two.Then I cut doors, windows and make the shape of a roof.


C tuvo uno de sus amigos en casa ese día, así que pense que era el proyecto perfecto para ese dia. Primero buscamos dos cajas pequeñas y  tuve la suerte de encontrar dos.Con ayuda de las tijeras recorte  puertas, ventanas y hacer la forma del techo.


Next I gave the kiddos some drawing paper to draw and color on it.

Luego les di a los pequespapel para dibujar y colorear 


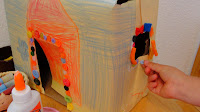
We glued the paper they colored on the box

Pegamos el papel  coloreado en la caja


C and her friend decorate the house with : poms,colored pasta ,buttons, scrapbooking flowers, beads, glitter and watercolor paint.

C y su amigo decoraron la casa con: pompones, pasta de colores, botones, scrapbooking flores, perlas, escarcha y pintura de acuarela.


After they were done decorating the toy houses, we put some tiny friends to play in.

Una vez terminado su projecto, buscaron algunos pequenos amiguitos para que jueguen en ellas


And some flashlights too...I love the simplicity of being a kid...don't you?

Y algunas linternas también ... Me encanta la simplicidad de ser  niño ... ¿a ti..no?


Sunday, July 14, 2013

Our Peg Doll Family TUTORIAL

Nuestra Familia de Clavijas de Madera


I bought some wooden peg dolls for C's birthday several months ago ,she was very excited on making "peg dolls family". I have some people asked me on how to paint peg dolls and where to get them, well since I am not an expert on this topic I will just share with you what we did.
For this project you will need:
-wooden peg dolls (I purchased them here)
-acrylic paint
-brushes,wipes and alcohol to wash off the paint from the brush
-toothpicks
-a pencil


Compré algunas clavija de madera por el cumpleaños de C hace ya varios meses, ella estaba muy emocionada en hacer "una familia de clavijas". Algunos de ustedes me han preguntado sobre cómo pintar los muñecos de clavija y dónde conseguirlos,pero como yo no soy una experta en este tema sólo voy a compartir con ustedes lo que hicimos.
Para este proyecto se necesita:
-clavija de madera (las compré aqui )
-pintura acrílica
-pinceles, trapos y alcohol para enjuagar los pinceles
-mondadientes
-un lápiz


First we draw the head, the face and then the body of each peg using a pencil.

Primero se dibuja la cabeza la cara y luego el cuerpo de cada clavija con un lápiz.


Then we start painting the hair

Luego empezamos a pintar con la pintura acrilica el cabello


Let it dry for a couple of minutes and start painting the face and then the body

Dejar secar durante un par de minutos y empezar a pintar la cara y luego el cuerpo


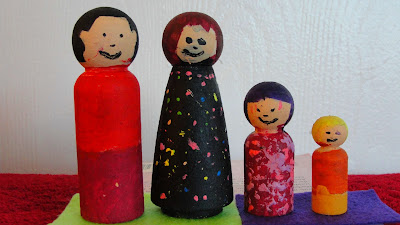
Since C knows I like the colors black as much as I like polka dots she decided to use a tooth pick to make colorful dots on my black peg doll mama dress.so cute!

 C sabe que me gusta el color negro tanto como me gustan los lunares de colores, ella decidió utilizar un mondadiente  para hacer puntos de colores en mi vestido negro. lindo!


I think our peg doll family rocks!!As a final touch we built a house  from craft sticks and hot glue for our family peg to live in.

Nuestra familia de clavijas queda muy original! Como toque final hicimos una casa de palitos de madera con pegamento caliente para que viva la familia clavija : )


Did you sign up to win a $50 gift certificate from Montessori Services, go here?

Saturday, February 2, 2013

Wreath with Felted Hearts..

Did you hear about our giveaway?Go here and check it out.

Leiste acerca de nuestro sorteo?Ve aqui y apuntate.


Corona de Corazones de fibra de fieltro


I like this wreath, it is so colorful and fun looking. I am going to share this tutorial with you and please let your child help you to create your own rainbow heart's wreath.It is a very simple project.

Me encanta esta corona, pero yo creo que C esta maravillada con los colores de estos corazones y sobre todo el esfuerzo que pusimos ambas en esta corona.
Es muy facil de armarla y porfavor deja a los peques de la casa que te ayuden, ya que ellos estan llenos de ideas geniales!


You will need:
-1 hay wreath
-1/4 of a yard of white fabric
-17 felted hearts (or you can  let your child cut hearts out of regular felt)
-a hot glue gun

Necesitaras:
-1 corona de heno (o cualquier otra)
-1/4 de yarda de tela blanca
-17 corazones de fibra de fieltro (o simplemente puedes utilizar fieltro)
-una pistola de goma caliente


You can find the hearts at my etsy shop clicl here

Puedes obtener los corazones en mi tienda etsy


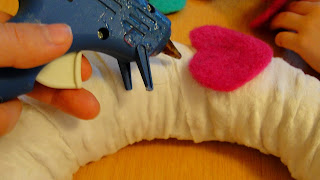
Cut strips of the white fabric and then start gluing it each at time all around the wreath

 Corte  tiras de la tela blanca y empieze a pegar cada una usando la goma caliente alrededor de la corona


 Just as in the picture, once the crown is fully lined in white start with the next step.

Asi como en la foto, una vez que la corona este totalmente forrada de blanco empezamos con el siguiente paso.


Using your glue gun start gluing the hearts one at the time around the wreath

Con su pistola de pegamento caliente comienze a pegar los corazones uno a uno alrededor de la corona


VOILA you are done!

Y eso es todo!


Enjoy the magic of colors..

Disfrute la magia de los colores..

Friday, January 25, 2013

Cute Napkins for kids:TUTORIAL

Tutorial Simple de Servilletas par los peques de la Casa


I made these double sided napkins for baby M (6 months old), these tutorial is very simple, if you don't have a sewing machine you can stitch by hand, it will take a little longer but you can do it!
We need:
-Flannel fabric 1/4 of a yard (maybe less, all depends in how many you want to make)
 -toweling white fabric 1/4 of a yard (maybe less, all depends in how many you want to make)
-thread
-scissors
-sewing machine or hand stitch


Hice estas servilletas de doble cara para  bebé M (6 meses), éste tutorial es muy simple, si usted no tiene una máquina de coser, no se preocupe puede coserlas a mano, se tardará un poco más, pero usted puede hacerlo!
Necesitamos:
-Tela franela 1/4 de yarda (tal vez menos, todo depende del tamano y la cantidad de servilletas que usted quiere hacer)
  - tela blanca de toalla 1/4 de yarda (tal vez menos, todo depende del tamano y la cantidad de servilletas que usted quiere hacer)
-hilo
-tijeras
-máquina de coser o puntada a mano


First,cut the fabric in rectangles, I cut my fabric in 8 x 5 inches, I think it is a good size for little hands, feel free to make them bigger or smaller, what ever works for you.

Primero corte ambas telas en rectangulos, yo las corte con medidas 8 x 5 pulgadas. Yo creo que es un tamano adecuado para las manitos pequenas de los peques de la casa. Si usted desea hacerlas mas grande o mas pequenas pues adelante.


Now we put together the flannel cute fabric on top of the toweling white fabric just like this.

Ahora coloque un rectangulo de tela de flanela con diseno y un rectangulo de tela blanca de toalla en parejas. Asi como en la foto


Set up your machine for zig zag stitch and start sewing around all sides.
Ahora coloca en punto zig zag tu maquina de coser y empieza a coser por todos los contornos de cada servilleta.


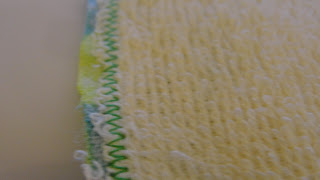
Now if you take a closer look to the edges of the fabric, you will noticed that it doesn't look quite of nice,it looks uneven, thread coming out...we need to fix that.

Una vez que hayas terminado de coser las servilletas, presta atencion en los bordes, no lucen muy bien que digamos verdad?se ven algo desordenados. que hacemos?


Get your scissors and cut outside the zig zag stitch evenly, in a straight line.

Usa tus tijeras y corta por fuera del punto zig zag y nivela los bordes


That is it! Throw them in the washer and feel free to iron them. (not me, I am not a big friend of the iron!!) 

Terminaste! Lavalas y si deseas las planchas (yo no, porque hace tiempo que la plancha y yo no nos llevamos bien!!)


Surprise your little one at dinner time with his new super cute napkins : )
I like the fact that these are double sided because when baby M spills some water, these napkins are the perfect tool , they hold pretty good!


Sorprende a tu pequeño a la hora de la cena con sus nuevas servilletas :)
Me gusta el hecho de que estas servilletas tienen doble lado, me sirve de mucho , cuando bebé M derrama agua de su vaso a la hora de comer (ya que aun no tiene la coordinacion apropiada, estamos trabajando en ello) estas servilletas son la herramienta perfecta, absorben muy bien!


Have a good weekend! Stop by on Monday for a great giveaway.

Que tenga un buen fin de semana! Regrese el Lunes para un sorteo genial en mi blog.

Wednesday, December 19, 2012

Holiday Crayons Tutorial

Crayolas en forma de arbol de Navidad


This is a fun and easy activity that you can do with your child following the Christmas spirit.

Esta es una actividad muy sencilla y divertida que puedes hacer con tus ninos siguiendo con las celebraciones por la Navidad.


First select the colors of crayons you want to use and sort them.

Primero selecciona los colores que quieres usar


Then peel the paper off from the crayons

Luego pela el papel de la crayola


Then brake them in small pieces and put them inside your tree silicone shapes (I bought this set at target the last year in 90% sale after Christmas was over)

Luego rompe las crayolas en trozos pequenos y colocalos en tus arboles de silicona (yo compre estos en target el anio pasado por 90% de oferta ,despues de las fiestas Navidenas)


Put them in your oven for 265 degrees for 20-25 minutes long, until it the wax melts completely. Get your molds out from the oven and let them cool for about 30 minutes or so.

Ingresa tus arboles al horno a temperatura de 265 grados por aproximadamente 20-25 minutos, hasta que la cera este completamente derretida. Retira tus moldes del horno y dejalos enfriar por aproximadamente 30 minutos.


Get the trees out from your molds gently if you break (just like I did) just put them inside the oven again.

Retira las crayolas de los moldes de manera delicada, pero si llegas a romper algunos (como yo lo hize), simplemente ponlos dentro del horno otra vez.
 

You can use these cool crayons as stocking gifts as well or as gifts for your child's friends too.
Go here to see my valentine's heart crayons.

Puedes usar estas crayolas para ponerlas en las medias de Navidad que van en la chimenea como regalos para la Noche buena o simplemente como regalos para los amiguitos de los nenes.
Vaya aqui para ver mi tutorial de crayolas de corazones