Showing posts with label needle felt. Show all posts

Thursday, June 7, 2012

Headband Felted Flower TUTORIAL

Banda de Cabeza hecha de Fibra de Lana TUTORIAL


Remember my last post about our visit to the farm, well we kept some of the wool that C sheared from the sheep. We dyed pink and brought it home. I asked C what could we do with the wool and she say she wanted a headband.

Recuerdan mi último post sobre nuestra visita a la granja? Bueno trajimos a casa algunas sobras de la lana que C esquilo de la oveja, la  teñimos rosa, entonces le pregunté a C ¿qué podíamos hacer con la lana y ella me dijo que quería una banda para la cabeza.


You will need:

Wool roving (2 colors)
Felting needle
A flower shape cookie cutter (I don't have one so I used a snowflake shape that found at my kitchen.it worked great).
A foam mat
A simple headband
and hot glue


Necesitaras:

Fibra de Lana (2 colores)
Aguja para fieltrado
Un cortador de Galletas en forma de flor (yo no tengo la flor asi
que use uno de copo de nieve, y salio bien)
Una esponja como base
Una banda para la cabeza
Goma caliente


                                               Put the wool inside the cookie cutter

Coloca la lana dentro del cortador de galletas


Start using your needle to poke on the wool

Empieza a pinchar la lana con la aguja


Let your child help but please tell her to be careful and not put her fingers on the way of the needle


Deja a tu nene que te ayude pero dile que porfavor tenga cuidado y no ponga sus deditos donde va la aguja porque puede  pincharlos (y duele..dimelo a mi!!)


                 After you think the wool is getting on shape, flip it over and keep poking then take the wool out from the cutter


Cuando veas que la lana esta cogiendo forma, dale la vuelta y repite el mismo procedimiento


Ok Now we are going to work on the button of the flower, get the other color of wool out (we choose purple that I already have) and gently pull a small piece of it


Ahora vamos a hacer el boton de la flor, ten listo el otro color de fibra (usamos morado) y delicadamente jala un trozo pequeno de esta


Roll it to make a small ball

Enrolla la fibra formando una bola


Put in the the center of our flower and start poking it with the needle

Colocala en el centro de la flor y empieza a pinchar con la aguja


Now your flower is ready for the next step

Ahora que ya tenemos la flor sigamos con el siguiente paso


Get the headband, glue gun and the flower ready

Necesitaremos la banda, la flor y la silicona caliente


Put glue into the back of the flower  and glued to the headband

Coloca la goma en la parte posterior de la flor y pegala en la banda


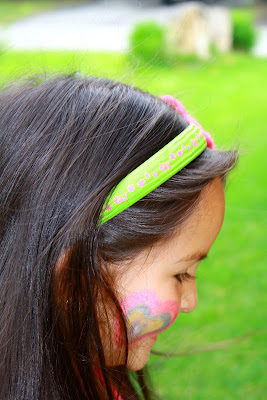
Now you have a unique beautiful wool flower headband and a happy girl... doesn't get better than that!

Ahora tienes una unica y hermosa banda de cabello y una nina feliz!!..mejor premio que ese no hay!


Love you kid!

Te amo mi chikita!


Thursday, April 7, 2011

April Sensory Bin

Caja Sensorial de Abril


When C saw this sensory bin she said " Can I play with it please..can I..can I" and then she said " I love it"..She made me smile..It is so rewarding to hear that from your child after you dedicate time on these little projects for them!

Cuando C vio esta caja sensorial dijo "Puedo jugar con la caja porfavor..puedo..puedo" y luego dijo "me encanta"..Al escuchar eso me dio mucha ternura..es muy lindo escuchar palabras tan alentadoras de tu pequeno despues que dedicas tiempo en preparar las actividades para ellos!

 Here is the list :

Aqui esta la lista de los materiales:


Felted eggs that we made few days ago.

Huevos de plasticos forrados con fibra de lana que hicimos dias atras.

 Fabric bean chicks made from yellow fabric and felt for the wings and beak. I used black marker for the eyes.(I got the idea from Living Magazine)

Saquitos de frejoles en forma de pollitos hechos en tela amarilla y para el pico y las alas use fieltro y marcadord e color negro para los ojos.(Obtuve la idea de la revista Living).


A Felted bird nest that I made days ago.

Un nido de pajarito de fieltro de lana que hice hace unos dias.


Tissue paper flowers. / flores de papel de tissue
Wooden beads / cuentas de madera en diferentes colores
Lace / un lazo
A garden pot / un pequeno macetero
And Colorful strings of paper ( My husband got it from his office...so it was free!) / Y para la base papel picado en tiras que a mi esposo le regalaron de su oficina.

I hope you guys have a nice day!

Buen dia!

Patty

Monday, February 28, 2011

Birthday Banner Tutorial


Guirlanda de Cumpleanos - Tutoria


It is difficult to believe that my girl is 3 years old now!!She had  a rainbow theme party days ago, good thing I finished making all her stuff before I got the sad new about my grandmother.
She wanted  rainbow colors on everything so I tried to do my best to make her wish come true : ) (that is my job eh).
You will need : Felt, fiber felt, fabric and a sewing machine...but you also can sew by hand.

First, Cut triangles out of your  felt. I cut out 16: one for each letter in “Feliz Cumpleanos”. My triangles are about 8” wide and 10” long.

Es difícil creer que mi hija tiene 3 años ! Ell tuvo  una fiesta hace pocos dias con decoraciones del arco iris, lo bueno fue que termine de hacer todas las cosas antes de que llegara la noticia triste acerca de  mi abuela.

Usted necesitará: fieltro, fibra de fieltro, tela y una máquina de coser ... pero también se puede coser a mano.
En primer lugar, recorte triangulos de fieltro a la medida que usted guste.Yo corté 16de ellos: uno para cada letra de "Feliz Cumpleaños". La medida de mis triangulos fueron  de 20 cm de ancho y 25 cm de largo.


2.  I used word to make the letters, print them, cut them out and then trace them in the triangles of felt using a pencil..Sorry it is hard to see the letter traced in the red felt (picture below).

Use el programa de word en la computadora para hacer las letras, las imprimi,las corte y traze cada letra en cada triangulo usando un lapiz de madera. Lo siento en la foto de abajo no se aprecia el trazado de la letra en lapiz.


3. Start needle  felting inside each letter traced in the triangle of felt.
 
   Comienza el proceso de aguja y fibra de fieltro dentro de cada letra trazada con el lapiz.


A very colorful project...I like it!This is a picture of my little desk working while C was sleeping.

Fue un proyecto muy colorido..me gusto!Esta es la foto de mi escritorio con todo mi material, aproveche en hacer este proyecto mientras que C  estaba durmiendo.


This is how it looks each letter after using the needle felting.

Asi lucen las letras una vez terminadas .

4. I am in love with this rainbow fabric I found at JoAnn  Fabric. I use it to make the strip that will hold the triangles to make the banner.

Cuando fui a la tienda de tela JoAnn Fabric y vi esta tela me enamore de ella!y pense que era perfecta para usarla en mis proyectos de Cumpleanos. Use esta en varios proyectos que les ensenare durante esta semana. Bueno corte tres tiras largas de esta para usar el lazo en los que los triangulos colgarian.


5. Cut the fabric in long stripes, start ironing with the side where you can see the folds face up..

Corte la tela en tres tiras largas, las doble por la mitas y las planche.


Just like this.

De esta manera.


and this

y esta..
Lay out the triangles in order, sew the top edges to the ribbon (rainbow fabric).

Luego colocas los triangulos en orden, coloca uno por uno en medio de la cinta de colores que hicimos y empieza a coser.


This was my favorite part...putting the pieces together!!

Esta fue mi parte favorita..poner todas las partes juntas y ver el resultado.!

My husband keep telling me that this banner is the coolest thing ever!! : ) I hope C liked too.

Mi esposo me dijo que esta guirlanda es su favorita!! : ) Espero que a C le haya gustado de igual manera.
I want  to thank to all of you for your kind comments and support after my grandmother's dead. I don't think this deep pain will go away anytime soon but I need to keep going ...right? THANK YOU MY FRIENDS!!Your comments helped me a lot.

Quiero dar las gracias a todos ustedes por sus amables comentarios y apoyo después de la muerte de mi abuela. No creo que este profundo dolor vaya a desaparecer pronto, pero tengo que seguir adelante ...verdad?  GRACIAS MI AMIGOS! Sus comentarios me han ayudado mucho.

Patty